Claim Your Free Estimate Today
Last Updated: November 7, 2026
Quick Summary
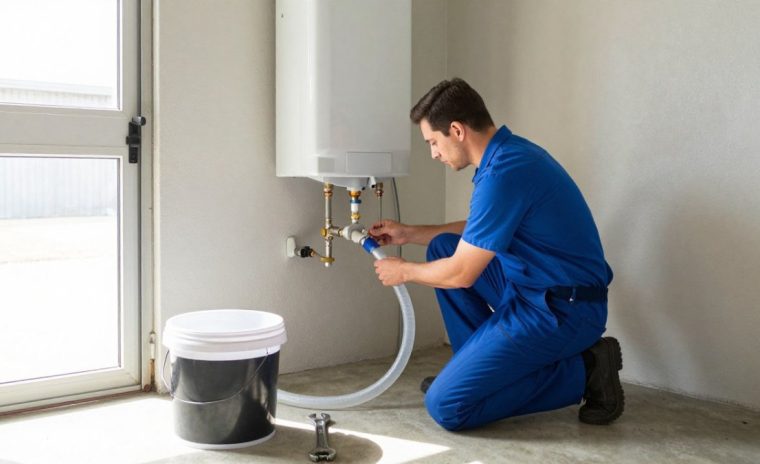
To flush a tankless water heater, shut off the gas or power and the water valves, then connect a pump and two hoses to the service ports so descaling solution circulates through the heat exchanger for 30 to 45 minutes. A typical flush takes about 45 to 60 minutes, and you finish by rinsing with clean water and checking for leaks.
- Let the unit cool for at least 30 minutes before touching any parts.
- Most residential service ports use standard garden-hose thread, but some models use metric or proprietary fittings.
- Use a five-gallon bucket to hold the descaling solution and catch the return flow.
- In very hard water above 10 gpg, flush every 6 months.
- White vinegar works for routine flushes, while commercial descaler suits heavy scale.
Is your tankless heater due for a flush?We handle tankless flushing, repair, and installs with upfront pricing and free estimates.
Table of Contents
- Why Scale Buildup Shortens a Tankless Water Heater’s Life
- Safety Prep Before You Touch the Tankless Water Heater
- Step-by-Step: Shutting Off Power, Gas, and Water Supply
- Connecting Hoses and Service Ports to Start the Flush
- What to Look for in a Tankless Water Heater Flush Kit
- How Often to Flush a Tankless Water Heater in Hard Water
- How Long to Flush a Tankless Water Heater and When to Stop
- Tankless Water Heater Descaler vs. Vinegar: Which to Use
- Frequently Asked Questions
Why Scale Buildup Shortens a Tankless Water Heater’s Life
Scale is the enemy of every tankless water heater. Every drop of water that passes through the unit carries dissolved minerals, mostly calcium and magnesium.
That coating is called scale, and it does real damage.
Hard water makes this worse.
Watch out: if your hot water flow has already dropped or the unit is throwing a scale-related error code, flushing alone may not be enough. Our team handles tankless water heater repair and can tell you whether the problem is scale, a failed part, or both.
If you want to know whether your own heater is already overdue, this guide on how to tell if a water heater needs flushing walks through the warning signs.
Safety Prep Before You Touch the Tankless Water Heater
Safety comes first, and this is where most DIY guides skip the important part. Before you touch a single valve, shut off the fuel and power. A tankless heater runs on gas or electricity, and both can hurt you.
Here’s your pre-flush checklist:
- Turn off the gas supply at the shutoff valve, or flip the breaker for an electric unit
- Let the unit cool for at least 30 minutes before touching any parts
- Close the water shutoff valves feeding the heater
- Put on gloves and eye protection, since descaling solution can irritate skin and eyes
- Have a bucket and towels ready for spills
Stop and call a pro if you smell gas, see corrosion on the gas line, or the valves won’t turn. Gas work is not a DIY job. If you’re unsure about any of this, our water heater service team can take over before you start.
Step-by-Step: Shutting Off Power, Gas, and Water Supply
Getting the shutdown right keeps you safe and sets up a clean flush. Work through these steps in order, and don’t rush.
Turning Off the Power Source
For an electric tankless heater, find the circuit breaker that feeds the unit and switch it off. Confirm the unit is dead by checking that the display or indicator lights are out.
For a gas unit, the burner won’t fire once the gas is off, but many models still draw power for controls. If your model has a power cord, unplug it. If it’s hardwired, flip its breaker.
Closing the Gas Supply and Water Valves
Turn the gas shutoff valve a quarter turn so the handle sits across the pipe. That’s the closed position.
Next, close the cold-water inlet valve on the heater. Then close the hot-water outlet valve. These are usually the two isolation valves mounted right on the unit. Once both are shut, the heater is sealed off from your home’s water supply, and you can work on it without draining the whole house.
Connecting Hoses and Service Ports to Start the Flush
A tankless water heater flush kit connects to the service ports on the unit, but the layout is not universal.
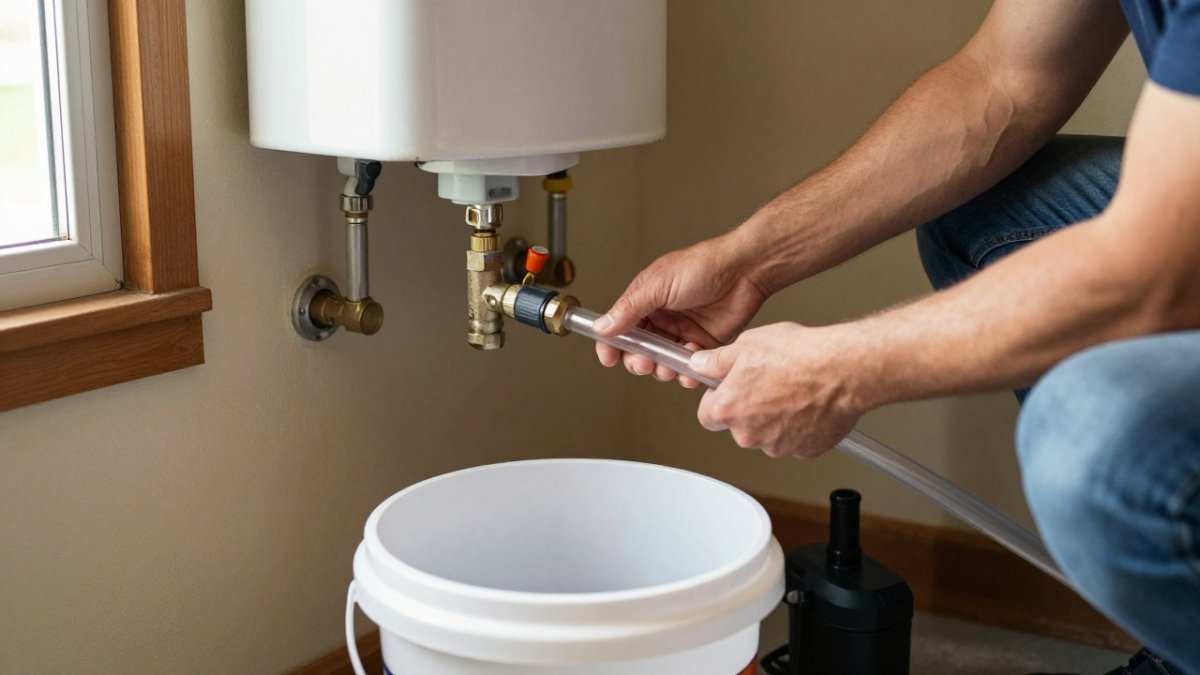
Service-valve layouts vary in ways that change the hookup:
- Isolation-valve style. Many units ship with two full-port isolation valves (one on the cold inlet, one on the hot outlet) that each have a small capped service port. You close the valve handle to isolate the heater, then remove the cap and thread the hose onto the port. The valve stays closed during the flush.
- Separate service-port style. Some models have isolation valves plus dedicated service ports on the piping, or ports built into the valve body that open only when the valve handle is turned to a specific position. Read the manual for the correct handle position; on some valves the port opens when the handle is at 45 degrees, not fully closed.
- Quick-connect style. A few manufacturers use color-coded quick-connect fittings that require a matching adapter hose. Standard garden-hose fittings will not seal on these, and improvising with tape or adapters is how homeowners end up with a leak at the port.
- Condensing vs. non-condensing. Condensing units often have a condensate drain near the service ports. Do not confuse the condensate line with a service port; connecting a flush hose to the condensate drain will send descaling solution into the wrong passage.
Here is the setup most kits use once you have confirmed the port type:
- Put the pump in a five-gallon bucket and fill it with descaling solution or white vinegar
- Connect one hose from the pump outlet to the cold service port
- Run a second hose from the hot service port back into the bucket
- Open both service valves so the solution can circulate
That loop lets the pump push solution through the heat exchanger and back into the bucket. You are bypassing the house plumbing entirely, which is the whole point of the service ports.
Watch out: if the caps will not turn by hand, do not force them with a wrench.
What to Look for in a Tankless Water Heater Flush Kit
A good tankless water heater flush kit saves you time and mess. You don’t need a fancy one, but a few features matter.
Look for these:
- A pump rated for the job. A submersible pump built for descaling moves solution at the right pace.
- Two hoses with the right fittings. They should match your unit’s service ports; most are standard garden-hose thread.
- A five-gallon bucket. This holds the solution and catches the return flow.
- Isolation valve connections. Some kits include quick-connect fittings that make hookup faster.
- A washable filter or strainer. It keeps debris from clogging the pump.
Skip kits with flimsy hoses or a pump that can’t handle vinegar. Check your owner’s manual first, since some manufacturers specify the pump flow rate and hose type for warranty coverage.
How Often to Flush a Tankless Water Heater in Hard Water
There is no single correct interval, and any guide that gives you one number is guessing about your water. Because hardness, warranty terms, and workload also shape what a heater needs beyond flushing, Clayton McKay connects those factors to the broader routine of keeping the system in good working order.
Start by finding your water hardness. Most municipal water utilities publish an annual water quality report that lists hardness in grains per gallon (gpg) or milligrams per liter (mg/L). If you are on a private well, a drop-in test strip or a lab test gives you a number. As a rough frame that is often used:
- Under 3 gpg (soft): annual flushing is usually enough, and some manufacturers accept every 12 to 18 months if the unit is lightly used.
- 3 to 7 gpg (moderately hard): annual flushing is the baseline; every 9 to 12 months is a common pattern.
- 7 to 10 gpg (hard): every 6 to 9 months is a reasonable working schedule.
- Above 10 gpg (very hard): every 6 months, and some technicians recommend quarterly inspection of the heat exchanger even if a full descale runs twice a year.
Those bands are rules of thumb, not manufacturer requirements. The binding number is in your owner’s manual, and it matters for warranty coverage.
Usage changes the math too. A unit serving a large household, a recirculation loop, or a hot tub will accumulate scale faster than one serving two people.
If you want to cut down on how often you flush, reducing the minerals going into the heater helps. Our guide on how to reduce hard water problems at home covers treatment options. And for a full maintenance routine beyond flushing, see how to maintain tankless water heaters.
Use your water hardness to pick a flushing interval, then check your manual for the binding number.
| Water hardness | Flush interval | Note |
|---|---|---|
| Under 3 gpg (soft) | Annual flushing is usually enough | Every 12 to 18 months if lightly used |
| 3 to 7 gpg (moderately hard) | Annual flushing is the baseline | Every 9 to 12 months is a common pattern |
| 7 to 10 gpg (hard) | Every 6 to 9 months | A reasonable working schedule |
| Above 10 gpg (very hard) | Every 6 months | Quarterly heat exchanger inspection sometimes advised |
How Long to Flush a Tankless Water Heater and When to Stop
A typical flush takes about 45 to 60 minutes from setup to cleanup. The circulation itself usually runs 30 to 45 minutes, depending on how much scale is in the unit and what your manual recommends.
Here’s the sequence:
- Circulate the solution through the loop for the time your manual specifies
- Watch the return flow; once it runs clear and the bubbles settle, scale is breaking down
- Shut off the pump and close the service valves
- Flush with clean water by running fresh water through the loop to rinse out the solution
- Reconnect everything and open the water valves
- Check for leaks at the service ports and valves
When to stop: if the unit throws an error code mid-flush, or you see a leak you can’t trace, stop and call a pro. Don’t keep running a pump on a unit that’s telling you something’s wrong.
Tankless Water Heater Descaler vs. Vinegar: Which to Use
White vinegar works for most routine flushes, and it’s cheap and easy to find.
Here’s the honest comparison:
- White vinegar: mild, safe for most heat exchangers, needs a longer soak, and smells strong. Good for annual upkeep.
- Commercial descaler: formulated to dissolve scale faster, works well on stubborn buildup, costs more. Check that it’s approved for your unit’s materials.
One rule matters more than the choice: follow your manufacturer’s instructions. Some makers warn against certain chemicals because they can damage the heat exchanger. When in doubt, use what the manual names.
Flushing a tankless water heater is a job most homeowners can handle with the right kit and a careful shutdown. But hard water, stubborn scale, and gas or electrical work are where DIY gets risky.
Frequently Asked Questions
Can I flush my tankless water heater myself?
Yes, most homeowners can flush a tankless water heater if the unit has isolation and service valves already installed. You need a flush kit, two hoses, a submersible pump, and a five-gallon bucket. The job takes about 45 to 60 minutes. If your unit lacks service ports or you are not comfortable shutting off gas and power, hire a licensed plumber. Never open the service ports without closing the isolation valves first.
How often do tankless water heaters need to be flushed?
Manufacturers typically recommend flushing once a year, but hard water speeds up scale buildup. In areas with high mineral content, flushing every six to eight months protects the heat exchanger. If you notice reduced hot water flow or rumbling sounds, flush sooner. A water softener upstream of the heater can stretch the interval. Check your owner’s manual for the specific schedule your model requires.
Can I use 30% vinegar to flush my tankless water heater?
Avoid 30% vinegar unless the manufacturer explicitly approves it. That concentration is far stronger than household white vinegar and can damage some heat exchanger materials if left too long. Standard white vinegar at 5% to 6% acidity is the common DIY choice, but a purpose-made descaler is safer because it is formulated for the metals inside a tankless unit. Always follow the manufacturer’s instructions and never exceed the recommended soak time.
How long does it take to flush a tankless water heater?
Plan on 45 to 60 minutes from start to finish. The circulation itself usually runs 30 to 45 minutes, depending on how much scale is present and what the descaler label says. Setup, including shutting off utilities and connecting hoses, takes about 10 minutes. Rinsing with clean water adds another 5 to 10 minutes. If flow stays weak after a full cycle, the unit may need a second flush or professional service.
