Claim Your Free Estimate Today
Last Updated: October 30, 2026
Quick Summary
To fix a leaking outdoor hose bibb in the desert, first find exactly where the water escapes: a handle drip means tighten or replace the packing, a spout drip means replace the washer or valve seat, and a wall leak means call a licensed plumber. Shut off the water supply before any repair.
- Tighten the packing nut a quarter turn to stop a handle drip, but stop once the drip quits.
- Replacing a hose bib washer takes about 15 minutes and a few basic tools.
- Replace the valve if the wall connection leaks, the body is damaged, or you repaired it twice in a season.
- Desert UV and heat cycling harden seals, so check the packing nut again about two weeks after a repair.
- White or chalky crust means plan on resurfacing or replacing the valve seat, not just swapping the washer.
Table of Contents
- Find the Leak Before You Touch a Wrench
- Outdoor Faucet Leaking at the Handle: Tighten or Replace the Packing
- Hose Bib Leaking at the Spout: Fix the Valve Seat and Washer
- How to Replace a Hose Bib Washer Step by Step
- Hose Bib Repair or Replace: How to Decide
- Desert Conditions That Wear Out Hose Bibbs Faster
- When a Wall Leak Means Calling a Licensed Plumber
- Book a Free Estimate for Your Hose Bibb Repair
- Frequently Asked Questions
Find the Leak Before You Touch a Wrench
A leaking outdoor hose bibb wastes water and can quietly rot the wall behind it.
The fix depends entirely on the leak’s location. A handle drip, a spout drip, and a wall leak are three different problems.
Here is how to trace it:
- Handle leak: water runs down the stem when the valve is on.
- Spout leak: water drips from the opening even when fully closed.
- Hose connection leak: water sprays where the hose threads on.
- Wall leak: water seeps from the pipe where it enters the house.
Wipe the fixture dry and watch it for a minute. If you suspect a hidden leak elsewhere, our guide to hidden leak signs you should never ignore helps you catch damage early.
Shut Off the Water Supply First
Turn off the water before any repair. Find the shutoff valve inside the house, usually on the pipe feeding the outdoor faucet. Turn it clockwise until it stops. Open the hose bibb to drain leftover water, then close it again. If no valve exists, shut off the main water line to the home.
Outdoor Faucet Leaking at the Handle: Tighten or Replace the Packing
An outdoor faucet leaking at the handle usually points to worn packing or a loose packing nut.
Start simple. Tighten the packing nut a quarter turn with a wrench. If the drip stops, you are done. If it keeps leaking, replace the stem packing.
Watch out: over-tightening the packing nut can crack it or make the handle hard to turn. Stop once the drip quits.
Hose Bib Leaking at the Spout: Fix the Valve Seat and Washer
A hose bib leaking at the spout means the valve no longer seals fully. The usual cause is a worn washer or a rough valve seat. Water drips from the opening even when the handle is tight.
Your options:
- Replace the washer: cheap, fast, and fixes most spout drips.
- Resurface or replace the valve seat: needed when the seat is pitted or scratched.
- Replace the whole valve: the smart call when the body is cracked or corroded.
How to Replace a Hose Bib Washer Step by Step
Replacing a hose bib washer takes about 15 minutes and a few basic tools.
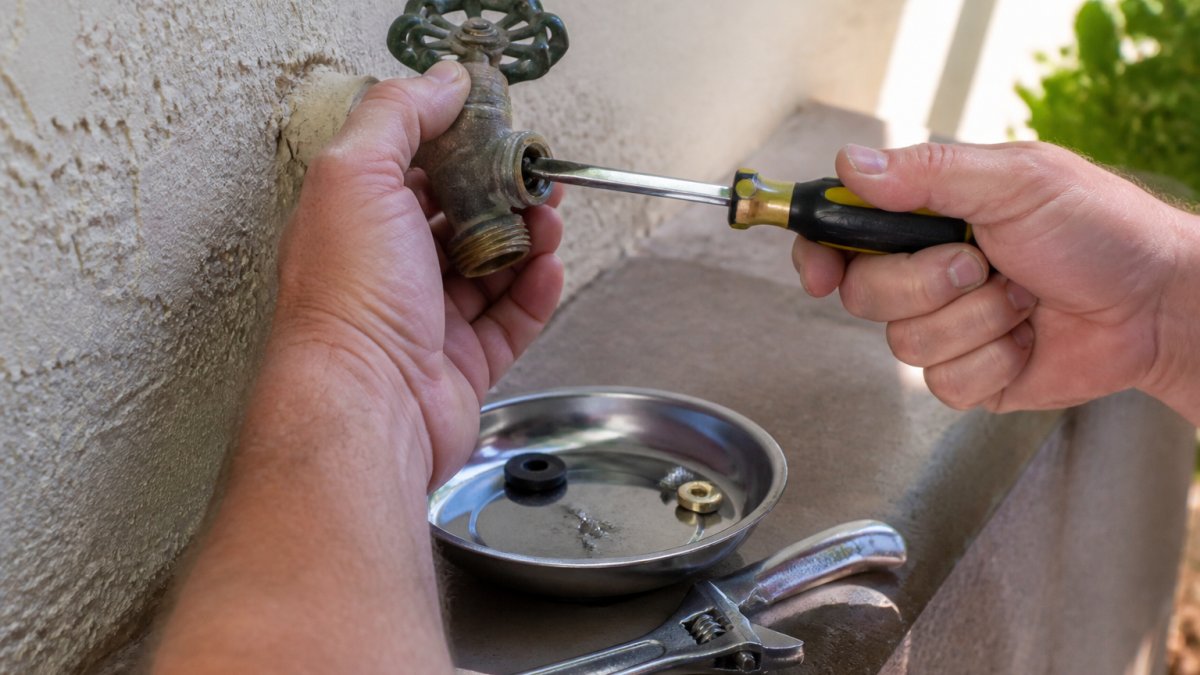
What you’ll need: an adjustable wrench, a screwdriver, a replacement washer, and a cloth.
- Shut off the water and drain the line.
- Remove the handle screw and pull off the handle.
- Unscrew the packing nut and pull out the valve stem.
- Pry off the old washer at the stem’s base.
- Install the new washer, matching the size.
- Reassemble the stem, nut, and handle.
- Turn the water back on and check for drips.
If the hose connection leaks instead, swap the hose washer. That small rubber ring is the usual fix.
Replacing a hose bib washer takes about 15 minutes and a few basic tools.
| Step | What to do |
|---|---|
| 1 | Shut off the water and drain the line |
| 2 | Remove the handle screw and pull off the handle |
| 3 | Unscrew the packing nut and pull out the valve stem |
| 4 | Pry off the old washer at the stem’s base |
| 5 | Install the new washer, matching the size |
| 6 | Reassemble the stem, nut, and handle |
| 7 | Turn the water back on and check for drips |
Hose Bib Repair or Replace: How to Decide
Repair wins when the problem is a washer, packing, or loose nut. Replace wins when the valve body is cracked, badly corroded, or freeze-damaged. For pipe repair that stops leaks at the source, see the repair options and warning signs. A frost-proof model that keeps splitting is not worth repeated fixes.
Claim Your Free Estimate Today →
Weigh it with these rules:
- Repair if the leak is at the handle, spout, or hose threads.
- Replace if the wall connection leaks or the body is damaged.
- Replace if you have repaired the same valve twice in a season.
Desert Conditions That Wear Out Hose Bibbs Faster
Desert conditions attack an outdoor hose bibb on three fronts at once: ultraviolet radiation, extreme heat cycling, and mineral-heavy water. Each one produces a different failure pattern, and knowing which one is chewing up your fixture tells you whether a repair will hold or whether you are patching a losing battle.
UV and heat: the seal killers
Rubber and synthetic seals degrade under sustained UV exposure. Similar thermal degradation often compromises the internal components of a broken sprinkler head, necessitating a systematic approach to restoring the integrity of your irrigation system.
Thermal cycling makes it worse. Desert days can swing dozens of degrees between afternoon heat and overnight cool. Metal and rubber expand and contract at different rates, so every day the valve body and its seals work against each other.
Pro Tip
After a repair, check the packing nut again in about two weeks. Desert thermal cycling often loosens it slightly after the first few hot days, and a quarter-turn retighten is usually all it needs.
After a repair, check the packing nut again in about two weeks. Desert thermal cycling often loosens it slightly after the first few hot days, and a quarter-turn retighten is usually all it needs.
Hard water and mineral scale
Desert water is frequently high in calcium and magnesium. When water evaporates at the spout or around the stem, it leaves mineral deposits behind.
If you see white or chalky crust around the spout or under the handle, plan on resurfacing or replacing the valve seat, not just swapping the washer. Flushing the valve, opening it fully with the hose off and letting water blow through, helps clear loose scale before it packs into the seat.
What this means for repair vs. replace
In desert conditions, the repair-or-replace call shifts. A valve that has been through several summers of UV and thermal cycling may have a body that is sound but seals that keep failing. Repeated washer and packing replacements on the same fixture are a signal that the seat or stem is worn beyond what a cheap part swap can fix. A frost-proof model that keeps splitting is generally not worth repeated fixes.
Protection habits that actually help
- Shade or insulate the fixture. A simple insulated cover or a shade block reduces the peak surface temperature the seals see.
- Flush scale each season. Open the valve fully with the hose disconnected and let it run to clear mineral buildup.
- Check seals before summer. Inspect the washer and packing in spring, before the heat peak, so a worn part is caught before it fails mid-season.
- Address hard water at the source if it is severe. A water softener or whole-house treatment reduces the mineral load reaching every fixture, not just the hose bibb.
When a Wall Leak Means Calling a Licensed Plumber
A leak at the wall is a different animal from a handle or spout drip. When water seeps from where the pipe enters the house, the problem is usually at the connection between the hose bibb and the supply line, a threaded joint, a soldered fitting, or a length of pipe inside the wall. Tightening the outside nut will not fix a failed joint behind the siding, and the hidden damage can spread into framing and insulation before you see it indoors.
How to tell a wall leak from a fixture leak
Wipe the fixture and the wall dry, then watch with the valve closed and the water on. If the wet spot appears at the wall penetration rather than at the spout or handle, the leak is at or behind the connection. A few patterns point to concealed damage:
- Water staining or softness on the interior or exterior wall near the bibb.
- A drip that continues with the valve fully closed, the valve is not the source.
- Rust or corrosion at the wall connection, which suggests a long-running slow leak.
- Any moisture indoors, including on baseboards, drywall, or flooring on the other side of the wall.
Where the DIY boundary sits
Replacing a washer, packing, or hose washer is a homeowner job. Resurfacing a valve seat is within reach for a careful DIYer. Anything at or behind the wall connection is not: the supply line may be under pressure, the fitting may be soldered or crimped, and opening the wall to reach it is a repair-and-restore job, not a parts swap. Learn what counts as an emergency and how to shut off water fast.
Watch Out
If water is actively flowing at the wall, treat it as urgent. Shut off the branch valve or the main, then call a plumber. Do not open the wall yourself to chase the leak, you can release more water and complicate the repair.
If water is actively flowing at the wall, treat it as urgent. Shut off the branch valve or the main, then call a plumber. Do not open the wall yourself to chase the leak, you can release more water and complicate the repair.
What a plumber will check
A licensed plumber will typically isolate the branch and inspect the connection and the pipe inside the wall to determine the appropriate fix.
If water is actively flowing, treat it as urgent.
Book a Free Estimate for Your Hose Bibb Repair
Some leaks are a quick washer swap. Others hide real damage behind the wall. When you want it done right the first time, Acclaimed Drain And Plumbing Solutions, LLC offers free estimates and 24/7 emergency service with live dispatchers. Our technicians aim to find the source, explain their findings, and give you clear options before any work begins. Ready to stop the drip? Book your free estimate today.
Frequently Asked Questions
Why is my outdoor spigot leaking even though the water is off?
If water still drips with the handle closed, the problem sits inside the valve, not the hose. A worn valve seat, a flattened washer at the bottom of the stem, or a cracked packing ring will all let water past a closed hose bibb. Shut off the supply at the interior shutoff valve, remove the handle and stem, and inspect the washer and seat for grooves or tears. In desert homes, mineral buildup on the seat is a frequent cause, so clean or replace the seat before reassembling.
Can extreme heat cause an outdoor faucet to leak?
Yes. Summer heat and intense UV exposure break down rubber washers, O-rings, and stem packing faster than in milder climates. The rubber dries, cracks, and stops sealing, which shows up as a drip at the spout or a leak at the handle. Sun-baked hose bibbs also expand and contract through hot days and cool nights, loosening packing nuts over time. Inspecting and replacing worn seals before summer is the simplest way to avoid a mid-season leak.
How do you shut off water to an outdoor hose bib?
Look inside the house directly behind the hose bibb for a shutoff valve, often under a sink, in a utility closet, or near the foundation wall. Turn the valve clockwise until it stops, then open the outdoor faucet to confirm the water is off and drain what remains in the line. Older homes sometimes lack a dedicated valve, in which case you shut off the main water supply. Label the valve once you find it so the next repair is faster.
How can you tell whether a hose bib should be repaired or replaced?
Repair makes sense when the leak comes from a washer, packing nut, or O-ring and the body is sound. Replace the unit when the valve body is cracked, the threads are stripped, the spout is deformed, or the leak sits at the wall connection where solder or fittings have failed. A hose bib that has already been repaired several times and still drips is usually worth replacing. A licensed plumber can confirm which option fits your fixture and wall type.
A leaking hose bibb is a small problem that grows into a big one when water reaches the wall. If you have tightened, replaced, and still see a drip, it is time for a professional look. Acclaimed Drain And Plumbing Solutions, LLC brings licensed diagnostics, flat-rate pricing, and free estimates to every job. Get started with Acclaimed Drain And Plumbing Solutions, LLC and stop the leak before it costs you more.
