
Claim Your Free Estimate Today

Table of Contents
- Sediment Buildup and Scale Formation
- Temperature and Pressure Relief Valve Failure
- Heating Element and Thermostat Issues
- Anode Rod Corrosion and Degradation
- Signs of a Leaking Water Heater
- Water Heater Maintenance Tips to Prevent Failure
- Pilot Light and Gas Supply Problems
- Electrical Circuit and Breaker Issues
- Frequently Asked Questions
Last Updated: August 18, 2026
Sediment Buildup and Scale Formation
Sediment accumulation is one of the most common causes of water heater failure. Over time, minerals and debris settle at the tank bottom, forming a layer that insulates the heating element from water, forcing your heater to work harder and shortening its lifespan. The problem intensifies in hard water areas, where calcium and magnesium deposits accumulate faster on heating elements and inside pipes.
Sediment is largely invisible until damage occurs. You might notice reduced water pressure, inconsistent temperature, or strange tank noises before realizing sediment has accumulated. By then, the heating element may already be compromised. At Acclaimed Drain And Plumbing Solutions, LLC, we recommend regular flushing as preventative maintenance.
Products like the Big Frog Supply BF.HG-34 Water Heater Pre-Sediment Filter Unit trap incoming debris before it reaches your tank. The 5-micron polyphosphate cartridge captures sediment, silt, dirt, and rust particles while discouraging scale formation. This unit costs $214.63. For tankless systems, the Pentair Hot Water Sediment Post-Filter System reduces clogging in showerheads and faucets while improving water pressure. This system traps sand, dirt, dust, and other debris as small as 5 microns.
Temperature and Pressure Relief Valve Failure
The T&P (temperature and pressure) relief valve is your water heater‘s safety mechanism. When internal pressure or temperature exceeds safe levels, this valve opens to release excess pressure, preventing tank rupture. When it fails, you face a serious safety hazard, the tank could rupture suddenly, causing water damage or injury.
T&P valve failure typically occurs due to mineral buildup, corrosion, or mechanical wear. A valve that sticks closed won’t release pressure when needed. One that leaks continuously wastes water and indicates internal pressure problems. Testing the valve annually is straightforward: lift the test lever briefly and listen for a quick burst of water and air. If nothing happens, or if the valve continues dripping after release, replacement is necessary.
T&P valve failure is often silent until critical. You might not notice anything until water pools around the tank base or unusual sounds occur during heating cycles.
Replacement requires precision and must be done by a licensed plumber. The valve must be sized correctly for your specific heater model and pressure rating. Incorrect installation leaves you unprotected.
Heating Element and Thermostat Issues
Electric Heating Element Malfunction
Electric water heaters depend on heating elements, electric coils submerged in the tank, to raise water temperature. When one fails, water temperature drops noticeably within hours. Many households don’t realize they have two elements (upper and lower) working in sequence until one fails and they lose half their hot water capacity.
Heating element failure happens gradually or suddenly. Sediment buildup insulates the element, forcing it to work harder until it burns out. Electrolysis can corrode elements prematurely. Hard water accelerates both processes.
Diagnosing a failed heating element requires checking electrical continuity. The Everbilt Water Heater Continuity Tester identifies whether an element is still conducting electricity. This tester costs $11.98. If the tester shows no continuity, the element is dead and must be replaced.
Replacement typically involves draining the tank partially, unscrewing the old element, and installing a new one. The Rheem Electric Water Heater Thermostat Kit includes both upper and lower thermostats for complete temperature control restoration. These factory-authorized genuine parts ensure compatibility and safety, with temperature range adjustability (100-150°F) to prevent overheating.
Thermostat Calibration Problems
Your water heater’s thermostat controls when heating cycles start and stop. A miscalibrated thermostat delivers water that’s either too hot or too cold, wasting energy. Over time, thermostats drift from their set point due to age, corrosion, or electrical drift.
Common signs include water that’s suddenly too hot (risking scalding) or too cold. Testing thermostat accuracy requires a reliable thermometer and patience. Set the thermostat to a specific temperature, wait for a full heating cycle, then measure actual water temperature at a faucet. If the difference exceeds 5-10 degrees, replacement is warranted. Thermostats are inexpensive compared to the energy waste caused by a faulty one.
Anode Rod Corrosion and Degradation
The anode rod is your tank’s sacrificial protector. Made from magnesium or aluminum, it corrodes preferentially instead of the steel tank itself. When fully corroded, the tank becomes vulnerable to rust and electrolysis, drastically shortening heater lifespan.
Most anode rods last 3-5 years depending on water quality and usage. Hard water accelerates corrosion. Many homeowners never replace their anode rod, which is why tank failure becomes inevitable around the 8-12 year mark. Replacing the rod every 3-5 years can extend tank life to 15+ years.
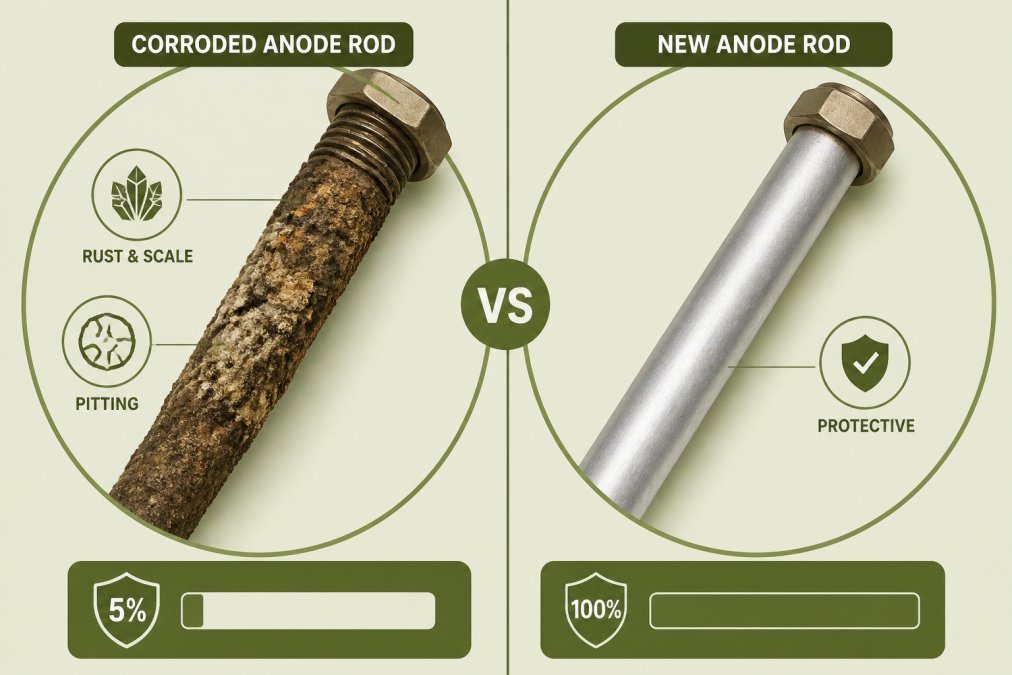
Removing a corroded anode rod is notoriously difficult. Sediment buildup and electrolysis can freeze it in place. The TORKROD Anode Rod Removal Tool uses a torque-multiplying mechanism specifically designed for stuck rods, reducing effort and preventing tank damage. For DIYers, the Ramkle Dual Hex Wrench offers a 2-in-1 solution for both anode rods and heating elements.
Replacing the anode rod is one of the highest-return maintenance tasks. The cost is minimal compared to the tank replacement it prevents. Acclaimed Drain And Plumbing Solutions, LLC includes anode rod inspection in routine maintenance checks, identifying degradation before it compromises tank integrity.
Signs of a Leaking Water Heater
A leaking water heater demands immediate attention. Small leaks at connections can be tightened or resealed. Leaks from the tank itself mean the tank has failed and replacement is necessary.
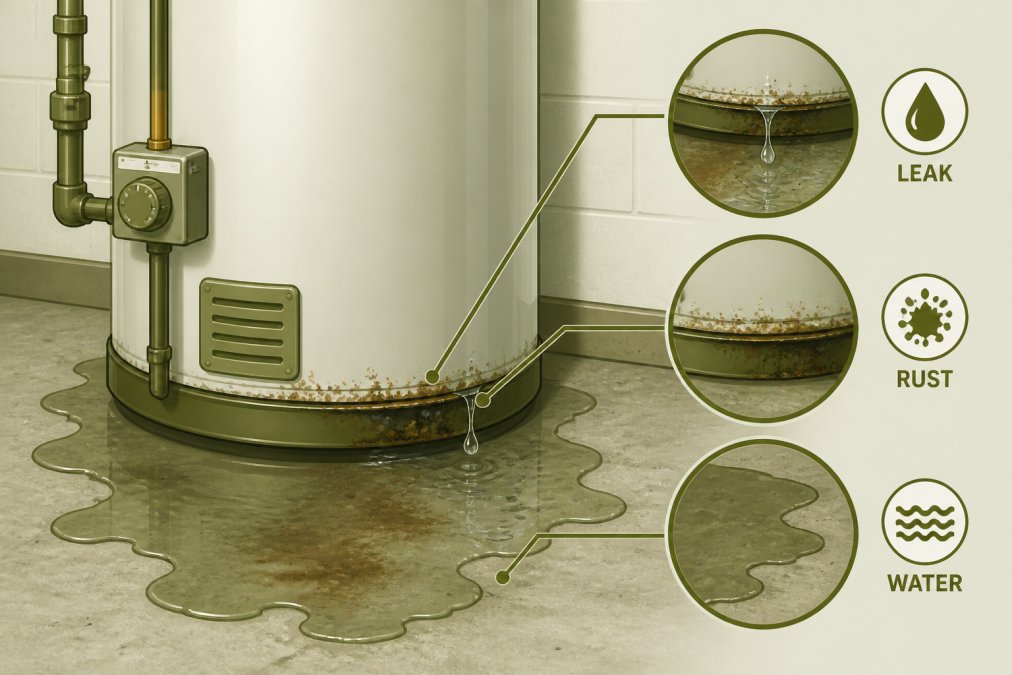
Identifying the leak source matters. Check the cold-water inlet connection, hot-water outlet connection, drain valve, and T&P valve discharge tube first. Tighten connections with a wrench; many leaks stop with simple tightening. If tightening doesn’t work, the connection needs resealing or replacement.
Leaks from the tank body signal internal corrosion has compromised structural integrity. Once the tank develops a pinhole leak or seam failure, patching is temporary. Tank replacement is the only permanent solution.
Claim Your Free Estimate Today →
Discolored water pooling around the tank indicates rust inside the tank is breaking through. This happens when the anode rod has fully corroded and the tank itself is now corroding. A failing tank can rupture suddenly, flooding your home with 40-50 gallons of hot water. Emergency response is justified.
Water Heater Maintenance Tips to Prevent Failure
Preventative maintenance extends water heater life by years and prevents emergency failures. The most critical tasks are simple and inexpensive when done regularly.
Drain and flush your tank annually to remove sediment buildup. This single task addresses the most common cause of water heater failure. Check your anode rod every 2-3 years; if more than half corroded, replace it immediately. Test your T&P relief valve annually by lifting the test lever, you should hear a quick burst of water and air. Inspect all connections monthly for drips or corrosion, tightening any loose fittings. Monitor water temperature and pressure; inconsistent readings often signal developing problems.
How to Flush a Water Heater
Flushing removes sediment accumulated at the tank bottom. The process takes 30-45 minutes and requires basic tools.
Turn off the water heater. For electric units, switch off the circuit breaker. For gas units, set the thermostat to pilot. Wait 30 minutes for the water to cool slightly. Connect a garden hose to the drain valve at the tank base, directing it to a floor drain or outside location. Open the drain valve slowly; hot water and sediment will flow out. Let the tank drain completely (15-20 minutes).
Once drained, turn the cold-water inlet valve on briefly to stir up remaining sediment, then drain again. Repeat 2-3 times until water runs relatively clear. Close the drain valve, disconnect the hose, and refill the tank by opening the cold-water inlet valve. Listen for air hissing from the hot-water outlet, this is normal as the tank refills.
For tankless water heaters, the Kelaro Tankless Water Heater Descaler Kit provides everything needed for flushing. This kit costs $134.97. For traditional tank units, the RectorSeal Calci-flush Standard Tank Water Heater Flush is a chemical descaler that eliminates calcium and scale buildup more effectively than vinegar alone.
Pilot Light and Gas Supply Problems
Gas water heaters rely on a pilot light, a small flame that ignites the main burner when heating is needed. When the pilot light goes out, the main burner won’t ignite and you have no hot water.
Common pilot light failures include thermocouple failure (this safety device detects the pilot flame and signals the gas valve to open; when it fails, the gas valve closes automatically), debris blocking the pilot orifice, gas supply interruption, and corroded pilot assembly.
Relighting a pilot light requires following your specific heater’s instructions. Most units have a reset button or lever you hold while igniting the pilot with a long lighter or match. Hold the button for 30-60 seconds after ignition to let the thermocouple warm up.
If the pilot light won’t stay lit after relighting, the thermocouple likely needs replacement, a 20-minute job for a plumber. Gas supply problems require checking the shutoff valve (located where the gas line enters the heater) and ensuring it’s fully open. If the valve is open and gas still isn’t reaching the heater, you may have a kinked line or larger gas supply issue requiring professional diagnosis.
Electrical Circuit and Breaker Issues
Electric water heaters draw significant current. A 4500-watt heater on a 240-volt circuit draws about 18.75 amps continuously during heating. If the circuit breaker trips repeatedly, you’re likely dealing with an overload, short circuit, or failing component.
Common electrical problems include tripped circuit breaker (the breaker cuts power as a safety mechanism when current exceeds safe limits; repeated tripping indicates an underlying problem), loose electrical connections, failed heating element, and moisture inside the control box.
Diagnosing electrical problems safely requires turning off power at the breaker and using proper testing equipment. The Everbilt Water Heater Continuity Tester checks whether components are conducting electricity correctly. If a heating element shows no continuity, it’s failed and must be replaced.
Loose connections are often the culprit. Turn off power, then carefully inspect all electrical connections at the heating elements and thermostats. Tighten any loose terminals with an appropriate wrench. If the breaker continues tripping after tightening connections and testing components, professional diagnosis is necessary.
Water heater failure doesn’t happen overnight, it’s usually the result of neglected maintenance and gradual degradation. Sediment buildup, anode rod corrosion, and valve failure are predictable problems you can prevent with simple annual maintenance. When you need professional help, Acclaimed Drain And Plumbing Solutions, LLC provides expert diagnostics and repair, identifying the source of failure and explaining your options clearly so you can make informed decisions about repair versus replacement. Contact us today to schedule a water heater inspection and claim your free estimate.
Frequently Asked Questions
What is the most common cause of water heater failure?
Sediment buildup is the leading cause of water heater failure. Minerals in hard water accumulate at the tank bottom, reducing efficiency, preventing proper heating, and eventually causing the heating element to fail. Scale formation on heating surfaces compounds the problem. Regular flushing removes sediment before it causes irreversible damage to your water heater.
How often should a water heater be flushed?
Most water heaters benefit from flushing once per year, though hard water areas may need flushing every six months. Annual flushing removes accumulated sediment, extends the lifespan of your unit, and maintains heating efficiency. If you notice reduced hot water pressure or discolored water, flush immediately rather than waiting for the scheduled maintenance window.
What are the first signs of a water heater going bad?
Early warning signs include inconsistent water temperature, reduced hot water pressure, discolored or rusty water from hot taps, strange noises (popping or rumbling), visible leaks around the tank base, and a water heater that takes longer to heat water. Catching these signs early through water heater maintenance tips can prevent complete failure and emergency repairs.
Should I repair or replace my water heater?
Consider replacement if your water heater is over 10-12 years old, requires frequent repairs, shows signs of a leaking water heater, or has lost significant heating capacity. Repairs make sense for units under 8 years with isolated problems. Factor in repair costs against replacement expenses, energy efficiency gains from a new unit, and your water heater’s remaining lifespan before deciding.
